Key takeaways
-
Setting up a food vendor tent is more than just placing a shelter. It’s about crafting a space that is secure, functional, and reflects your brand’s identity.
-
Factors like budget, size, style, portability, and weather resistance are critical for organizing a food vending tent.
-
Whether it’s a pop-up canopy, frame tent, or custom food vendor tent, the right option will make your setup both functional and compliant with regulations.
-
Implementing best practices guarantees a successful vendor tent setup and helps you avoid common pitfalls.
-
Always do proper preparation beforehand to ensure an efficient workflow, minimize bottlenecks, and keep the event organized, especially when space is limited on event day.
Introduction
Stepping into the vibrant world of food vending at events, farmers' markets, or festivals is an exciting venture.
Your culinary creations might be the star, but your operational hub plays a crucial supporting role, ensuring everything runs smoothly.
A well-chosen and properly set up food vendor tent not only protects you, your crew, and your food from the elements but also acts as a powerful branding tool and a functional workspace.
This guide dives into pro tips, common mistakes to avoid, and a comprehensive checklist to help you optimize your tent setup.
Best tents for food vendors
Selecting the ideal tent is foundational to your success. It needs to be durable, functional, and representative of your brand.
Popular options specifically designed to meet the demanding needs of food vendors include:
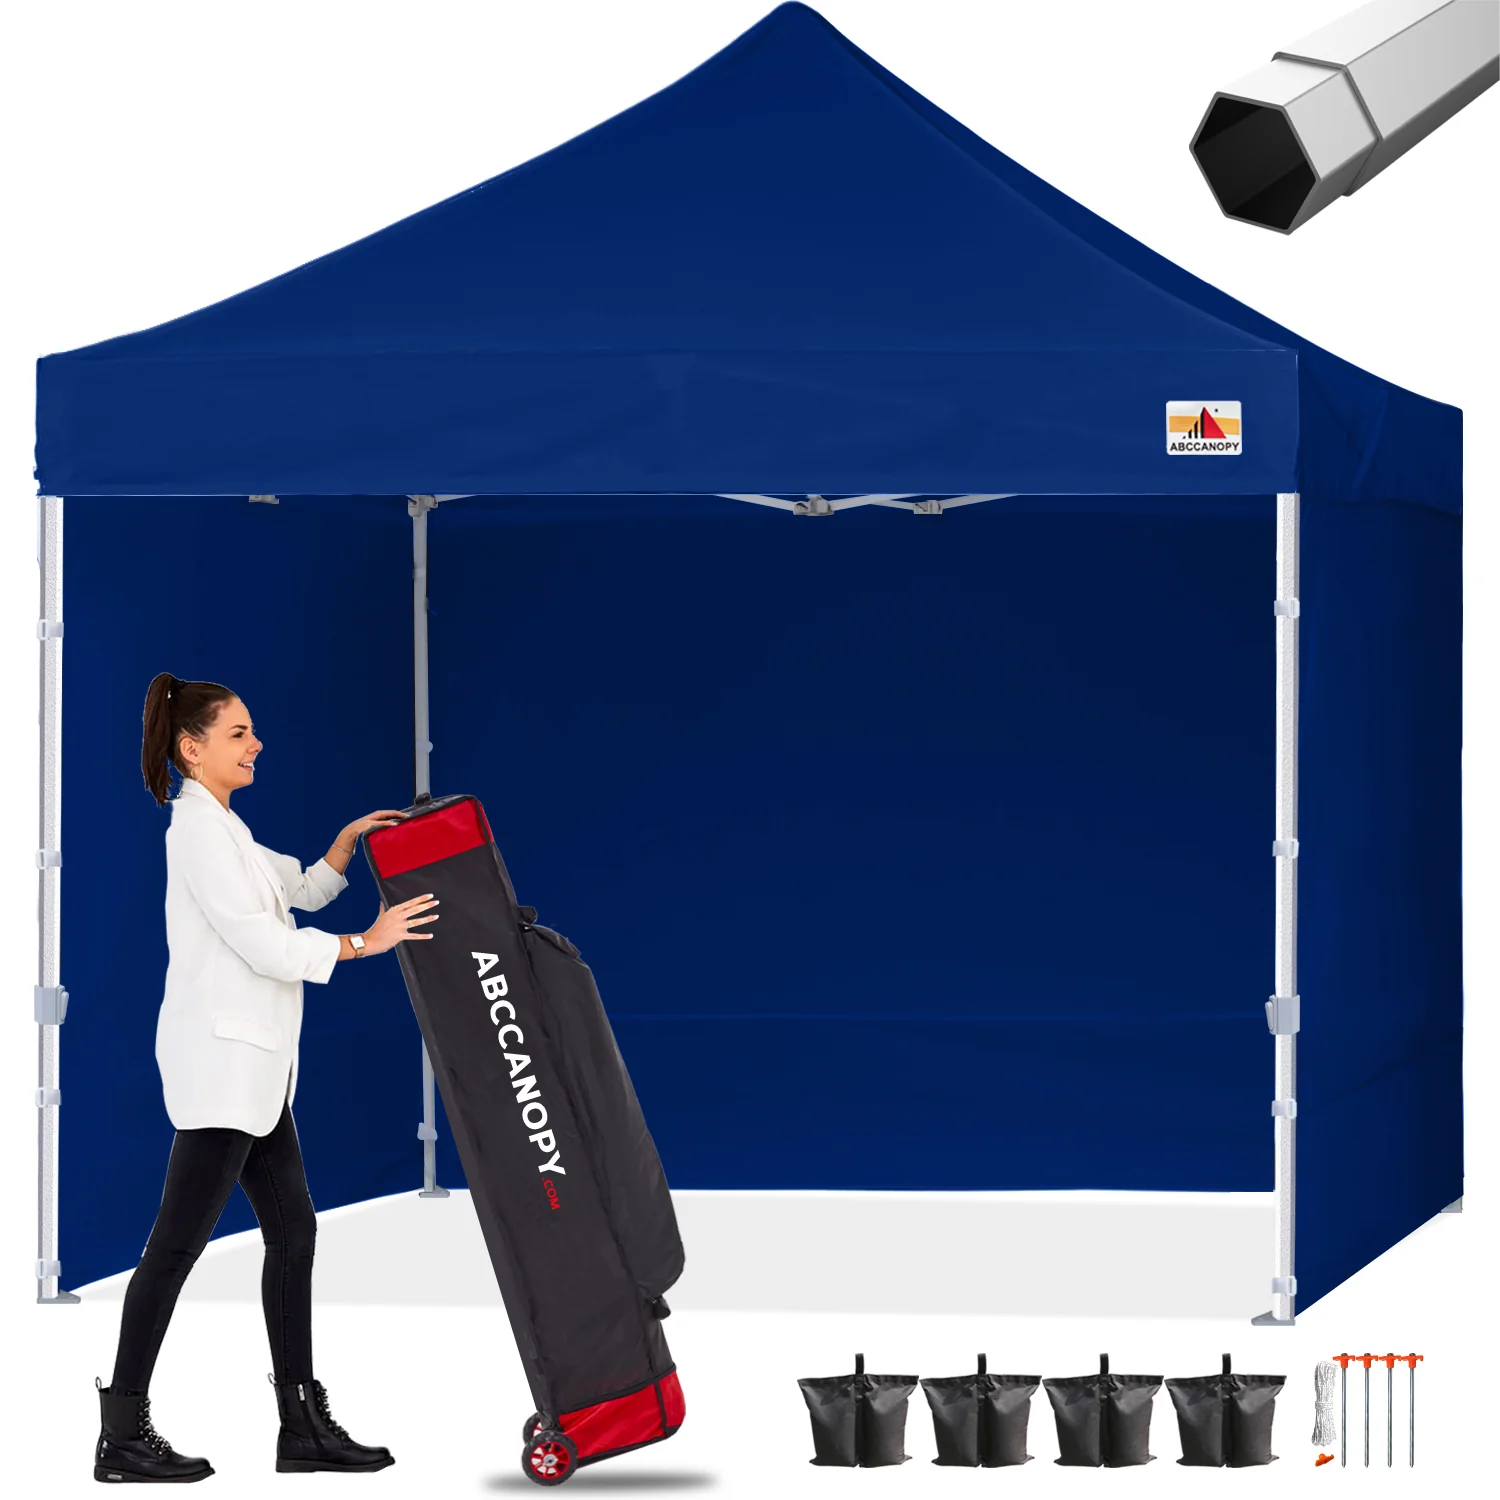
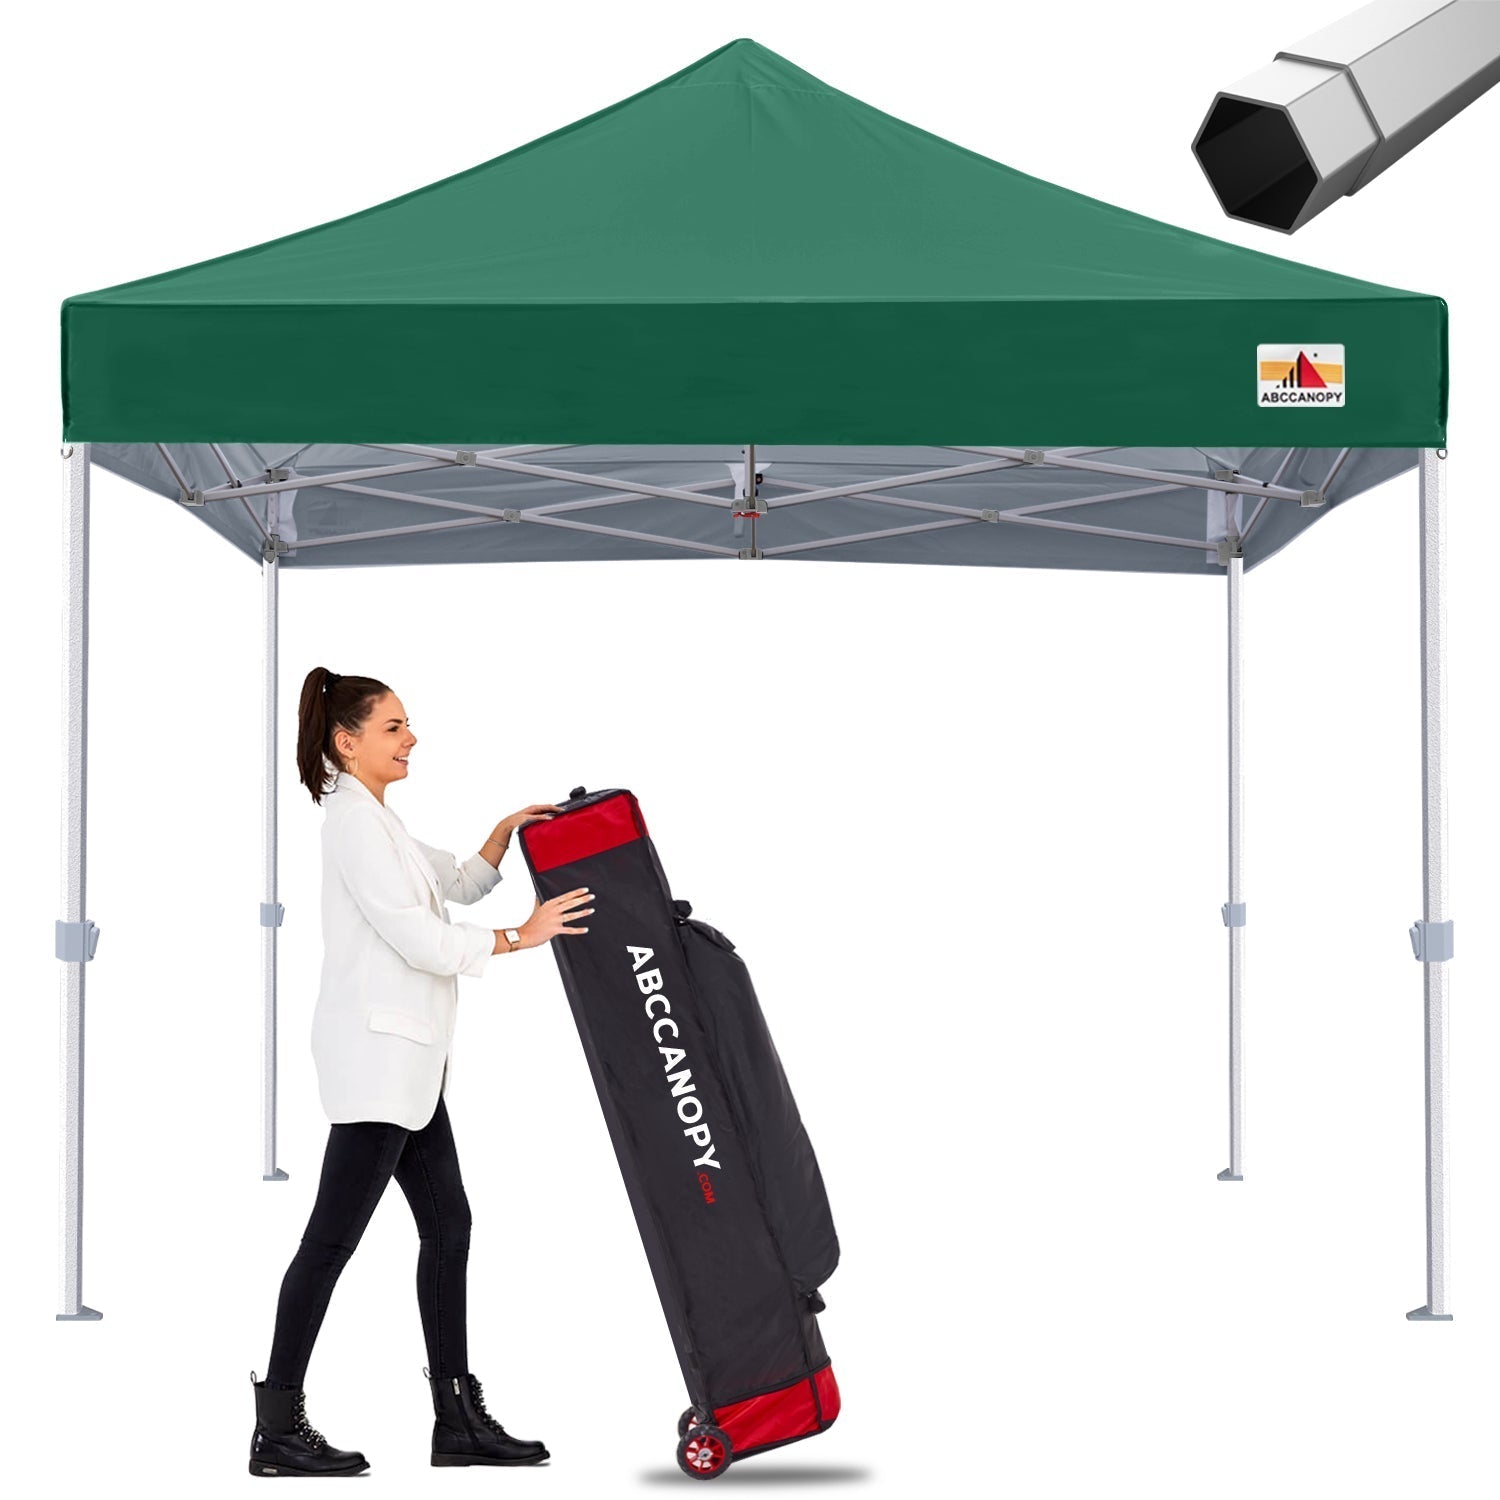
Pop Up canopies

Pop-up canopies are often the go-to choice for food vendors due to their lightweight, portable design and easy setup.
They are typically popular for the 10 FT collections, including sizes like 10x10, 10x15, and 10x20, making them ideal for various vendor booth configurations.
USP: Quick and effortless setup, they are ideal for vendors with fast-paced event environments.
Frame tents

Known for their durability and versatility, frame tents feature no center poles, offering a wide, open interior, perfect for complex food setups or multi-station booths.
They can be used on almost any surface as they can be staked on grass or secured with weight bags on hard ground.
USP: The unobstructed interior space helps maximize layout flexibility, especially for larger operations.
Custom food vendor tents

Designed with food service in mind, these specialized tents often include mesh panels, roll-up service windows, and fire-retardant materials to meet food safety regulations.
Furthermore, with its full graphic customization, it can transform the canopy into a potent branding tool, presenting a highly professional image that attracts customers and reinforces your identity.
USP: Designed with built-in food service features, these types improve hygiene, efficiency, and customer experiences.
Heavy-duty food vendor tents

Built for durability, this premium collection features reinforced fabrics and sturdy frames to handle harsh weather and frequent use.
One of their standout features is the inclusion of fully enclosed sidewalls and doors, which provide superior protection against wind, rain, and dust.
Their added security and privacy ensure extra peace of mind during your busy operations.
USP: Fully enclosed sidewalls for maximum protection, security, and reliable performance in any environment.
What to consider for vendor tents: 7 key factors
Choosing the perfect food vendor tent requires careful consideration of several factors.
Thinking through these elements beforehand guarantees you invest in a shelter that serves you well in the long run:
1. Budget
When considering your budget, think beyond the initial price. While higher-quality tents may have a higher upfront cost, their durability and additional features can provide better long-term value, reducing the need for repairs and replacements over time.
2. Types of tent
While there are many available options in the market, vendor tents typically fall into two main categories. Each is catered to different needs and preferences:
-
Standard tent: This model is designed to meet basic requirements for vendor setups. They are typically more affordable and ideal for a straightforward setup where branding isn’t a priority.
-
Custom tent: For vendors looking to make a lasting impression, this option offers the opportunity to incorporate personalized designs, colors, and logos to leverage your brand image or event theme.
3. Tent size and style
To ensure your tent is fully functional and meets the compliance requirements, carefully balance out between the allocated space and workspace needed for you and your crew.
Whether it’s a small, medium, or large canopy, the right size will complement the event's suitability and operational needs.
Additionally, getting sidewalls, either from solid fabric or mesh option, are valuable add-ons that offer added protection, ventilation, and privacy.
4. Portability
If you’re setting up solo or with limited help, portability really matters. Choosing a lightweight tent is key, but having a roller bag can make all the difference.
(Did you know: Custom Tent includes a complimentary roller bag with every canopy purchase.)
It makes transport way easier, protects your gear, and universal models most likely to fit comfortably in the trunk of a car.
5. Weather conditions
As your tent is your primary defense against the elements, choose one built to withstand typical conditions in your area.
The S1 Commercial, S2 Premium, and S3 Professional series each offer distinct levels of durability and weather protection. Constructed from high-quality steel or aluminum, these canopies are specifically engineered to withstand varying degrees of wind, rain, and frequent usage.
Choose the model that best aligns with your local climate and intended application for optimal performance. See the full comparison here.
6. Customization
Sometimes, a tent doesn’t only serve as shelter but an extension of your brand. It offers the flexibility to customize everything from design to color scheme and even messaging that will help you stand out in the crowds.
If you’re interested, learn more about the custom process in detail and browse through Custom Tent’s gallery for some food tent setup inspiration.
7. Accessories
Last but not least, enhancing your food vendor tent setup with the right accessories is a great way to improve functionality, comfort, and safety.
Useful additions like sidewalls, flags, weights, and tablecloths can boost your brand presence while improving your customer experience.
Setting up a food vendor tent: Step-by-step guide
While most standard models are straightforward, adding extra elements, like sidewalls, involves a few additional steps.
Check out these food tent setup hacks that help you get ready in less than 2 minutes:
Standard pop-up tent setup
-
Remove the canopy frame out of the roller bag and partially expand it.
-
Place the canopy top over the frame and secure the velcro tabs to the truss bars.
-
Next, fully expand the frame and extend each leg until it clicks securely into its locking positions.
Canopy with additional sidewalls
-
Once the canopy is fully set up, attach the top of the sidewall to the canopy trusses using the built-in velcro straps.
-
For single-wall use, secure the sidewall to each frame leg with the velcro tabs provided.
-
Meanwhile for multiple walls, you can connect them seamlessly using the integrated zip connectors at the edges.
Tips for food vendor tent setup (best practices)
Beyond the basic mechanics, optimizing your setup enhances efficiency, safety, and customer appeal.
Consider these practical tips to have a successful vendor tent set up in any setting:
-
Plan an optimal vendor tent layout: It’s best to sketch out your space or come a day before the event day to ensure a logical flow of your prep areas, cooking stations, serving counters, payment spots, etc.
This helps reduce movement, avoid crowding, and keeps your team working smoothly.
-
Prioritize safety & anchoring: Secure your tent with appropriate weight bags, especially on hard surfaces where stakes cannot be used. Small weights might not be sufficient in windy conditions.
At the same time, check event rules, as some require specific weights or anchoring methods.
-
Maximize visibility & branding: Position your tent in a high-traffic area whenever possible to attract attention. Consider a location that's not too crowded but also not too isolated.
Your branding elements, such as banners, flags, or printed table covers, will also create a focal point while enhancing a professional presence.
-
Adhere to vendor tent setup regulations: Familiarize yourself with the event’s setup rules beforehand, such as restrictions on tent size, fire safety protocols, and health department standards.
Additionally, keep your permits and certifications easily accessible on-site for inspections.
-
Prepare for the weather: Check your local weather forecast beforehand and be ready for various conditions. Even on sunny days, unexpected wind or rain can happen.
Ensure your sidewalls are secured properly, electrical cords are safely routed and protected from moisture, and have a plan for protecting inventory and equipment.
Common vendor tent setup mistakes
Overlooking key details during setup can lead to chaos, costly damage, or even being asked to pack up and leave. Here are some common slip-ups that vendors often make:
-
Inadequate anchoring: Wind gusts can lift unsecured or under-weighted tents, causing property damage and serious injury. This puts both people and property at risk—especially in crowded outdoor settings.
-
Ignoring event regulations: Failing to comply with rules regarding fire safety, health codes, or specific setup requirements set by the organizer can lead to warnings or removal from the event.
-
Poor workflow layout: A disorganized setup hinders efficiency, resulting in increased stress for staff, slows down service, and can create safety hazards like tripping over cords and blocking emergency access.
-
Setting up too close to hazards: Positioning tents under unstable trees, near power lines, or alongside busy traffic zones may create unnecessary risk. Proximity to grills or cooking equipment can also increase fire hazards.
-
Not practicing setup: Showing up without testing your setup beforehand often leads to delays, confusion, and a lot of last-minute stress. Struggling to assemble the tent on-site can look unprofessional and waste valuable prep time.
Vendor tent setup checklist
Behind every seamless food vendor setup is a checklist of well-thought-out actions. Whether you're a first-timer or a seasoned vendor, solid preparation is what sets you apart.
Use this checklist to guide your setup and stay ahead of the curve:

Pre-event day
-
Confirm event details: Double-check setup time, booth location, space size, and regulations.
-
Inspect your tent and equipment: Look for missing or damaged parts and test setup if needed.
-
Prepare layout plan: Sketch out your booth setup for efficient flow and space use.
-
Pack essentials: Include tools, signage, permits, anchoring weights, and weather protection gear.
-
Brand materials ready: Ensure banners, tablecloths, and menus are printed and clean.
Event day
-
Arrive early: Allow enough time to set up without rushing and handle any surprises.
-
Secure your canopy: Use proper weights or stakes based on surface and weather.
-
Set up layout efficiently: Arrange prep, cooking, and serving stations as planned.
-
Test electrical and safety gear: Make sure cords are safe, fire extinguishers are accessible, and handwashing stations (if required) are in place.
-
Do a final check: Ensure branding is visible, signage is clear, and pathways are unobstructed.
Conclusion
Your food vendor tent is far more than just an overhead cover; it's your mobile storefront, your operational base, and a key part of your brand identity.
By carefully considering all key factors involved in choosing the right tent, from budget and size to weather resistance and customization, you lay the groundwork for success.
Avoiding common mistakes and utilizing best practices, including strategic layout and proper anchoring, ensures smooth operations and a professional presentation.
Most importantly, you should have a clear checklist of what to do before and during the event day for a smooth operation.
If you’re ready to elevate your food vending game with a durable, functional, and eye-catching tent, explore a variety of options from Custom Tent today!